Update: Check out the result from Smelting Experiments 2.
Note: All the pictures here come from this collection. If you want a different angle or something, it might be there.
I thought it would be interesting to try smelting copper, old school style. I find myself drawn to ancient technologies, and this is one of the oldest. Last year I taught myself some flintknapping, so it only makes sense to move from the neolithic to the chalcolithic. This is a basic overview of what I did, with the help of some friends. Hopefully it might prove useful to someone.
Research: The web wasn't much help, so I had to turn to dead trees for some background information. The books I used were:
The basic idea is pretty simple. Most metal on the planet isn't in metallic (or native) form. They appear in ores as various oxides, silicates, sulfides, etc. To get a useful metal, the other elements have to be removed. This is done by getting it very hot in a reducing atmosphere, so that the spare carbon can grab all the oxygen from the ore. (This is the general case for a simple oxide. Roasting before smelting can help turn some of the other compounds into oxides. It also makes the ore easier to crush.) The only way to get these conditions in a primitive furnace is a charcoal fire with forced air.
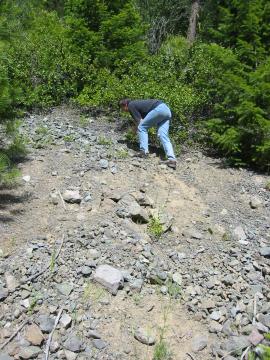
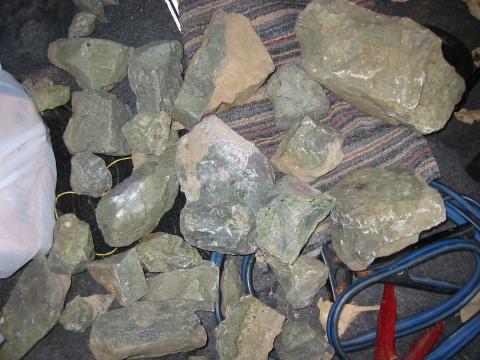
First, we needed ore. USGS kindly provides datasets of known mineral deposits. We found one which would provide an excuse for a nice scenic daytrip, outside Mazama, WA. We just drove around the area until we found a cutting with green rocks.
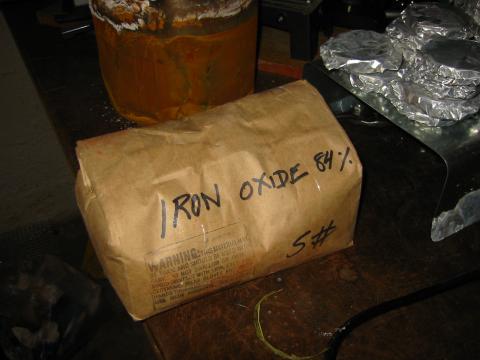
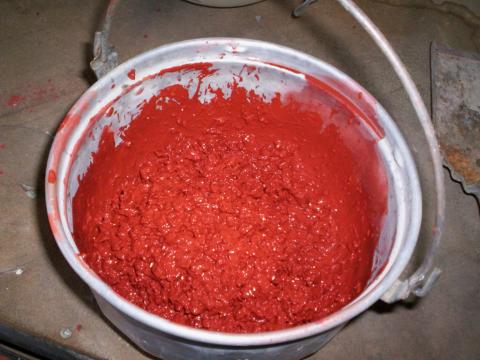
For improved smelting, you also need a flux. The ore will always have lots of stuff in it that you're not interested in, generically called gangue. In lots of copper ores the gangue is primarily silica which melts at a high temperature. To get good results you want a very liquid slag, so that the copper can move through it easily and form a nice plano-convex ingot at the bottom. To do so you need to add something that will combine with the silica to form a compound with a lower melting point, a eutectic. The standard choice is iron oxide. (Or, if your ore is iron rich, as with chalcopyrite, then you use silica.) Which sounded simple -- lots of rust in the world, right? -- until I actually started to think about where one can get a couple kilograms of rust. The traditional source at Timna was petrified wood, which doesn't help a lot. After playing with some crazy ideas like making it from iron filings, or using bloodmeal, I looked into ceramic pigments. Bingo! Seattle Pottery Supply to the rescue with a 5 pound bag for about $10.
Unsure about the quality of the ore we had found, I also ordered $10 worth of malachite/azurite from ebay. Shortly after these experiments I found this store which sells good looking copper ore for $2 a pound. As cool as finding the ore ourselves was, I'd suggest buying it unless you're very sure of the quality.

Also unsure about how messy this process would be, I decided it was best not to do it in suburban Seattle. My dad was pretty keen to help out as well, so we drove over to Spokane for Canada Day/Independence Day weekend. Having done it now, I think it could be pretty safely done in a dense urban area. A pit furnace is very contained, and the charcoal fire puts out almost no smoke. It does get the ground around the furnace very, very hot, though, so take all appropriate precautions. It could easily kill/ignite local root systems.
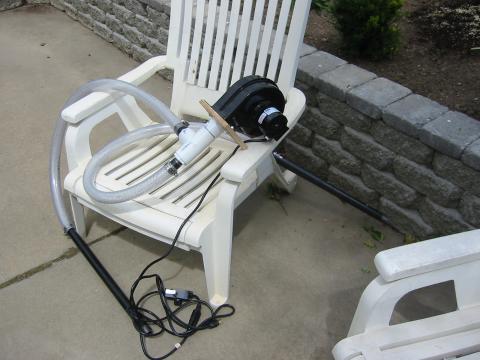
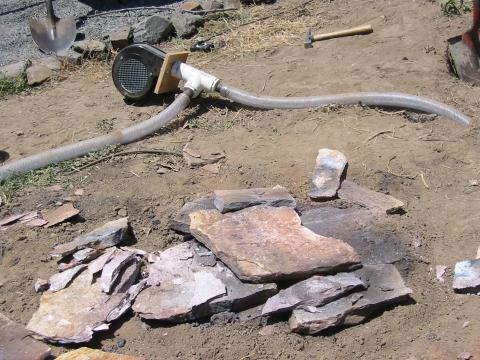
The basic furnace is a pit 20-30 cm across. You blow air into it at the bottom through pipes called tuyeres. Traditionally these would be ceramic, but black iron pipe will do just fine for this kind of setup. Don't use galvanized pipe: Heating galvanized pipe releases the zinc coating to form zinc oxide, which is toxic and causes respiratory problems.
We used two tuyeres and had an electric blower with a variable speed controller feeding them. This, of course, is not very authentic, but no one really wanted to man the bellows for 6 hours at a time. A small blower like this was more than capable of providing enough air, even with the rather inefficient hose connections we used.
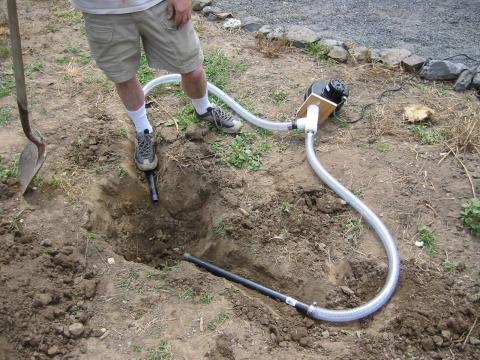
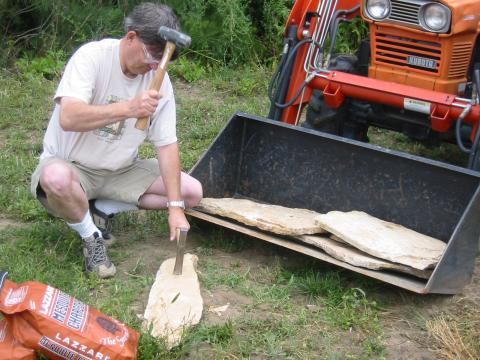
We lined the furnace with paver stones we picked up at a local rock yard. As recommended by Agricola, I wanted something like sandstone, but they didn't have any. What we picked worked, mostly, but next time I'm definitely adding sandstone to my list of things to procure ahead of time.
The furnace was insulated with powdered granite we had available as tailings from the household well. Sand would be more standard, but this worked just fine and also packed much better than sand. Best would have been to form it out of clay and then fire it, but we didn't have the time -- if you heat it up too soon, the moisture left inside can blow out sections of the wall, possibly very dramatically.
Charcoal was added and we let it pre-heat for an hour.
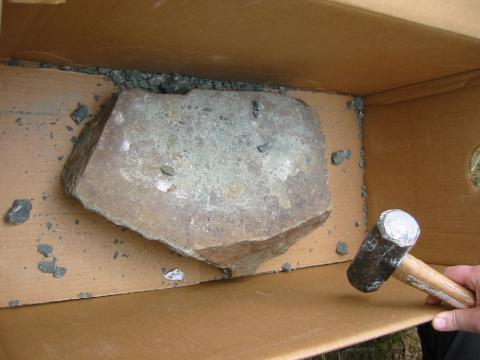
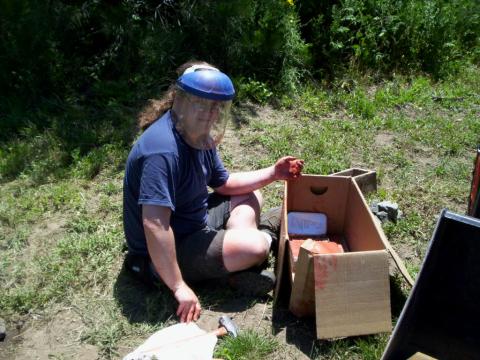
The ore crushed easily enough with a 3 pound hammer. We used a flat rock as an anvil, which worked okay until it broke into multiple pieces. The framents fly in all directions, so a box to collect them is recommended and eye protection is absolutely required. Despite crushing easily, there was a lot to crush. It was the powers-of-two problem from Asteroids in real life! We switched off the job frequently.

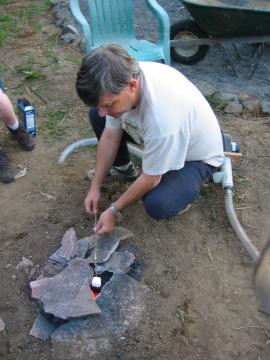
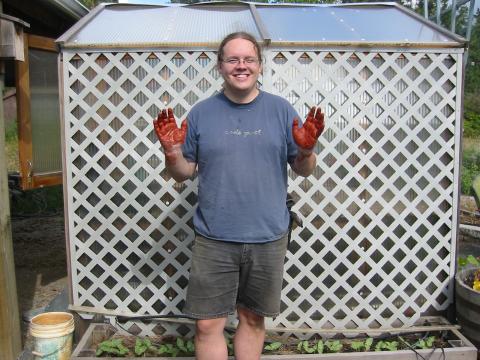
We stopped when we had several handfulls of ore reduced to a mixture of small gravel and powder. Next it was mixed with the iron oxide flux. I was concerned with the very fine iron oxide powder flying back out of the furnace, so I decided to mix them together with some water. This turned out to be both unnesessary and really messy. Oh well.
After the furnace had pre-heated for an hour we added a handful of the ore/flux mixture along with a new charge of charcoal. For the rest of the 5-hour firing we added more charcoal at 30-minute intervals, along with two more handfuls of ore. This was not very photogenic, nor indeed very interesting. As it was burning down at the end, we took advantage of the very even heat for a snack. As long as you didn't get the marshmallow too close immediately, so the center had time to melt, it made excellent smores.
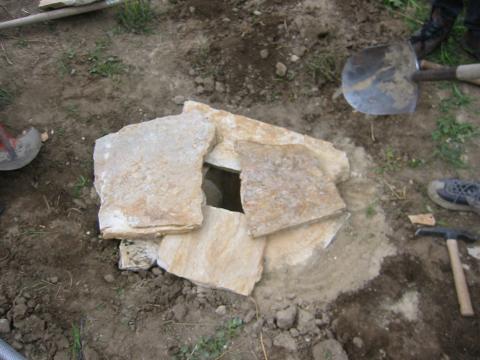
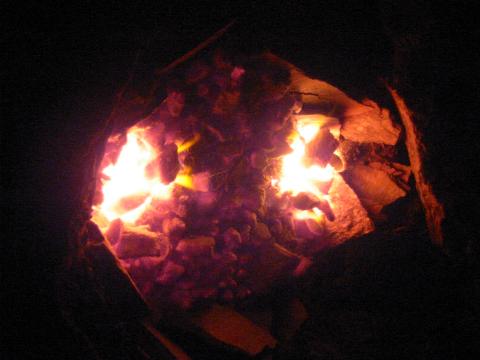
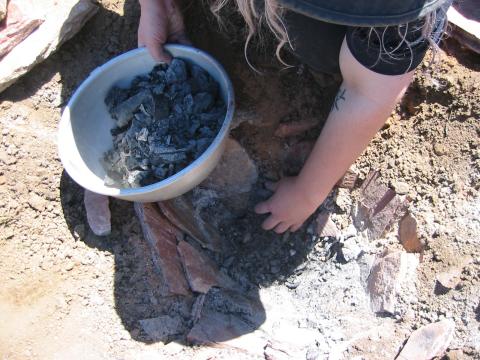
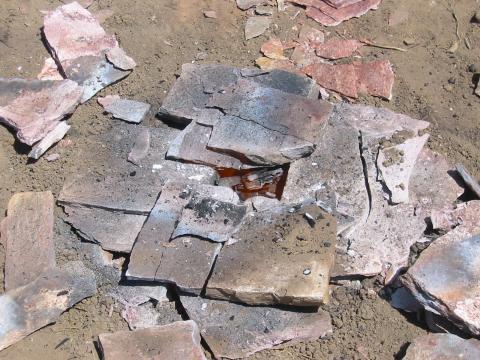
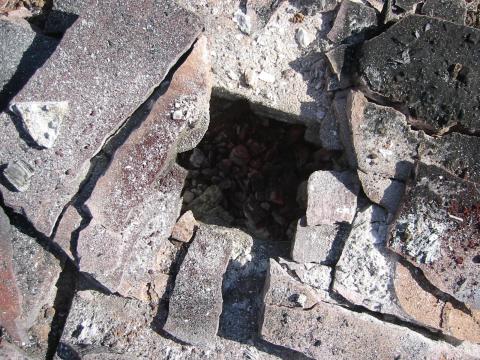
After it had mostly burned down, around 22:00, we flipped open the lid. The undersides of the rock slabs were glowing, which was very impressive in the dark.
We turned the air back on at this point, to see what the heat distribution had been like. It was immediately obvious that the furnace had been too wide and too shallow. We decided that the second furnace would be more like a cylinder than a bowl, no matter what the Timna archeological digs found. One of the tuyeres was also mounted too high.
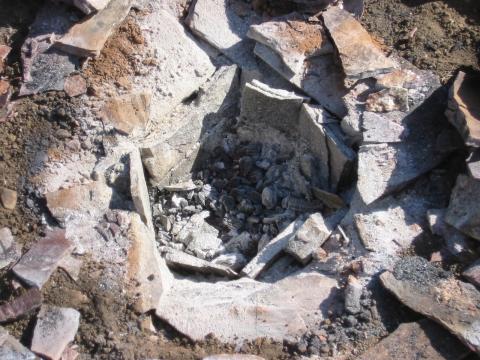
Digging around in the coals and ash, we found one of the ore charges as a dessicated, charred lump. Dumping it in as a damp, cohesive handful was a bad idea. It fell apart with a light tap. No vitrification, no real slag.
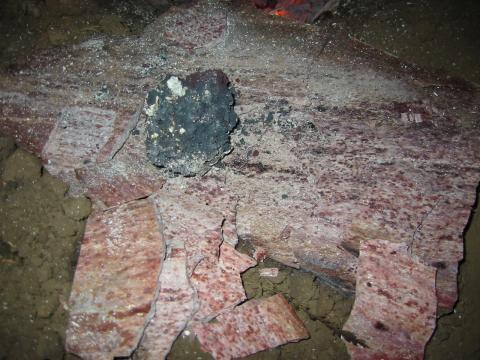
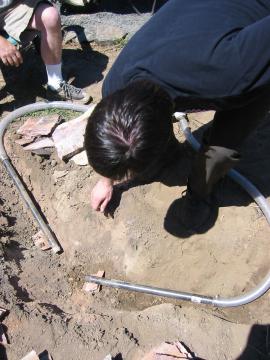
Further sifting revealed a couple small chunks of real slag. Unfortunately, none of the contained any metallic copper. All were destructively tested by hitting them with a hammer to see if they deformed or shattered. The ash in the bottom of the furnace was thouroughly sifted and panned the next morning, to make sure we hadn't missed anything. We hadn't.
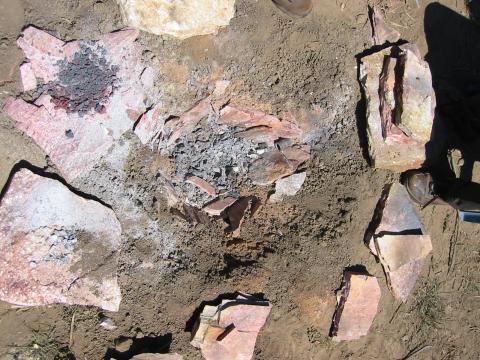
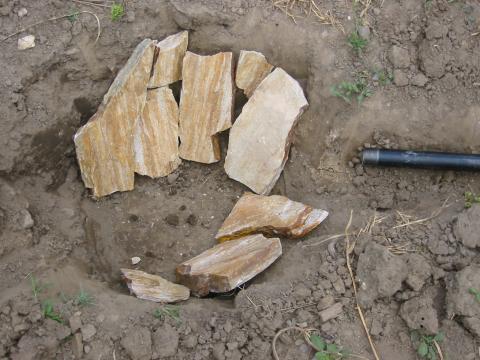
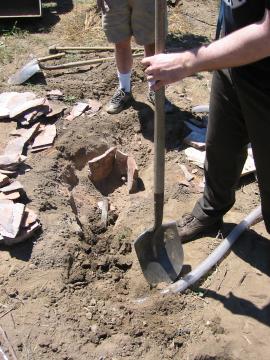
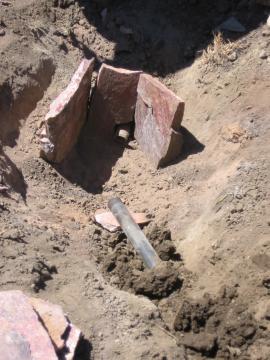
We got to an earlier start on the second day. The furnace was rebuilt along the lines we decided on the previous night. Cylindrical instead of bowl shaped, wide enough so the areas of heat from the tuyeres would just overlap. Inspired by De Re Metallica, we decided the width should be one palm and two digits. (About 20 cm.) Agricola would be proud. We also wanted to make the furnace deeper, so there would be a good head of charcoal to feed the fire. We had to reuse the rocks from the first furnace, and they were already in poor shape. Almost all had cracked at least once.
I decided to recrush the ore/flux mixture. There was plenty left, but after the results from the previous night I was worried about the larger chunks. This combined the worst elements of ore crushing with the flux mixing -- tiring and filthy. But the end result was a really nice grit, with the remaining moisture holding the iron oxide on nicely. I also crushed the samples I got from ebay. Unfortunately, while pretty, I don't think they contained much copper. Most were solid quartz with some azurite nodules on the surface.

The new furnace lit up much easier than the first, either because of design or greater experience on our part. As it spent an hour heating up, it seemed obvious that it was a much hotter fire. It was eating charcoal much faster and by the end of the hour the entire inside was glowing yellow.
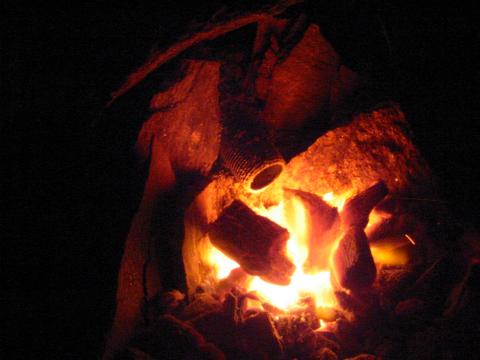
The ore/flux was added over about an hour, more with each refueling. The fire was obviously far hotter than the previous day -- the lid slabs would crack as we watched, over a period of 20 minutes. On the next refueling they would crumble and have to be replaced. Running out of slabs large enough, and worried about all the bits that were falling down into the furnace, we decided to abandon the lid concept and leave a narrow opening in the top. This also allowed us to add charcoal on a more continuous basis, which should have minimized the thermal cycling on the walls, and thus hopefully reduce the spalling. I think I would go with this design for future furnaces.
Even without a lid, the edges of the top were slowly eaten away by the heat. We added more iron oxide to try to counterbalance the extra silica. As it turns out, we should have added more. Sandstone next time, for sure. (Firebrick and modern refractories would be better, of course, but I'd really like to get a good smelt out of a tradition design/materials first.)
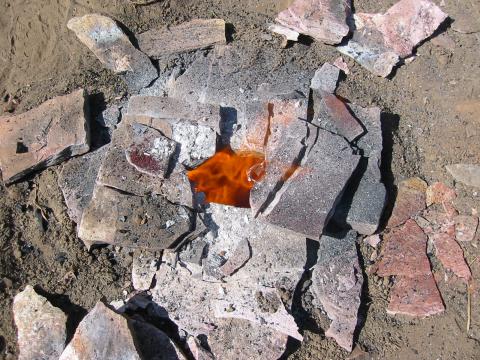
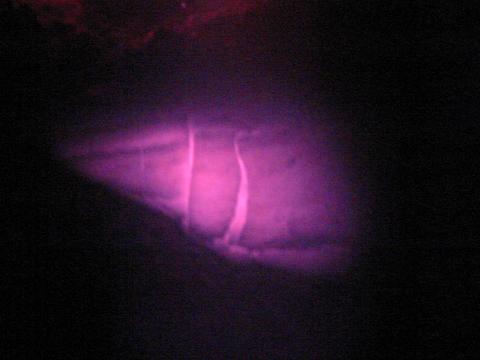
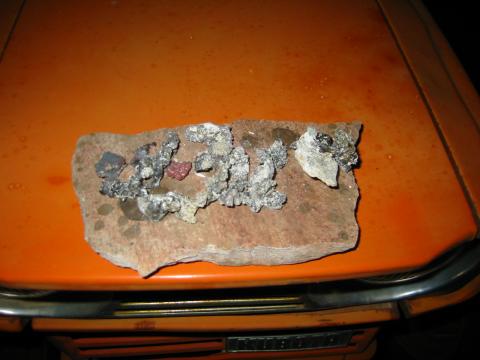
Due to the increased demand with the second furnace, we ran out of charcoal only about 4 hours after the ore had been added. We let it burn down and then started to look for results. The entire bottom of the furnace was a giant lump of slag -- very encouraging!
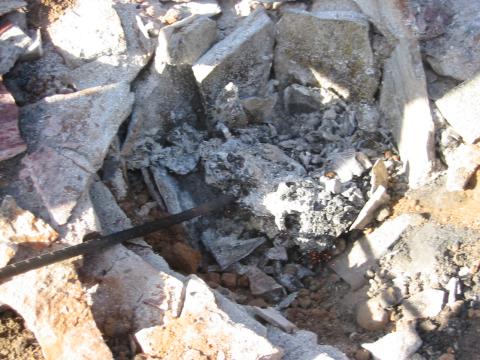
There were lots of obvious rock lining fragments embedded in it, but most of it was real, glassy slag. It didn't look like it had ever been completely molten, which I blame on the excess silica from the rock lining. It also had oddly yellow bits of feathery ash and smelled noticeably of sulfur. I'm not sure where the sulfur would have come from; presumably either the ore or the rock lining. Either way, not a good sign. Sulfur can mess up a lot of metallurgical processes.

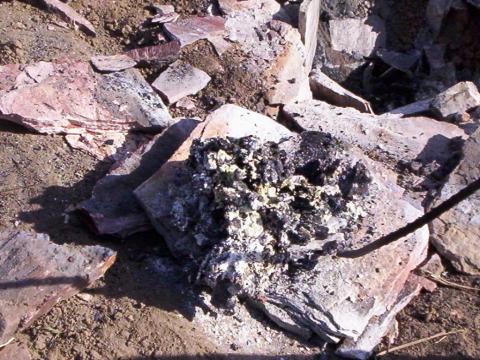
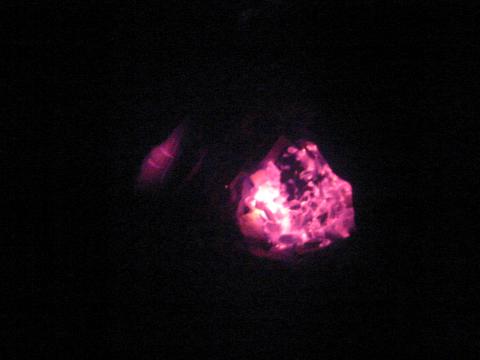
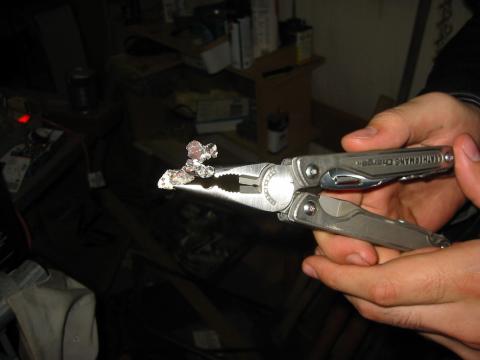
We spent some time breaking the slag apart, as well as panning the ash and dirt left in the furnace. We found copper in two forms. Most of the lining fragments had changed into a glossy, marble-like white. On a few of them there was a very delicate vein pattern on the surface of what looked to be metallic copper. It was far too thin to do anything with, and I don't know where it came from. Either copper from the ore was deposited there as a vapor, or there were traces of copper in the lining rocks which was reduced in situ.

We also found a very small lump of actual metallic copper. It was the only bit of that entire lump of slag that didn't shatter.

So, after two days of fairly hard work, we got enough copper for maybe 3 BBs. What went wrong? Currently we think it was the ore. None of us are geologists; we just found some greenish rocks. Unfortunately not all greenish rocks actually contain copper. The rock yard we were at had some greenish gravel labeled as serpentine, which looked a lot like our ore. There isn't actually a single mineral called seperntine, but lots of them are green or blue and none contain copper. Bummer.
Update: I've been told that our "ore" was epidote, a copper free silicate. Oh well. We'll buy ore for the next run to be sure, and if we ever go prospecting again we'll prepare a bit better.
We definitely plan to do this again sometime, once we can find the time and space in which to do it. I've already found a potential source for better ore (see above) and we've certainly learned a lot about furnace construction. Overall it was a filthy, exhausting, completely fabulous project. It was a wonderful thing to sit around the furnace and feel a connection to a tradition that goes back over six thousand years. This was one of the technologies that changed humanity forever, really extreme cutting edge stuff for its time. It was probably only independently invented two or three times, and I can see why now. This is not easy, even with 21st century knowledge.